SimCapture Mobile Camera app
Explore the SimCapture Mobile Camera app, a handy tool for recording and analyzing simulation scenarios on your phone, transforming how you capture and review training simulations.
Table of Contents
- SimCapture Cloud Release Notes
- SimCapture Cloud Administrator and Faculty Help
- SimCapture Cloud Learner Help
- SimCapture On-Premise Help
- SimCapture for Skills Help
- SimCapture Mobile Camera App
- SimCapture Companion Apps Help
- SimCapture Integrations Help
- Samaritan Help
- SimCapture Cloud Use Cases
- Hardware and Network Technical Information Help
- Glossary
The SimCapture Mobile Camera app turns your mobile device into a portable audio and video system for recording and live streaming simulation sessions through a SimCapture Cloud domain.
Things to know before you begin
You will need the following for using the SimCapture Mobile Camera app. These recommendations may vary according to the Wi-Fi quality. Should you need to record offline, see Mobile Camera Offline Recording mode.
Software
- A SimCapture Cloud domain
Hardware
- A mobile device, phone or tablet that is compatible with iOS 17 or Android 13/14 or newer.
- PC or Mac with browser that has access to SimCapture Cloud functionality.
Technical Requirements
- Consistent internet connection/full coverage of the area where the simulation is running.
- Recommend 100Mbps down/20Mbps up minimum, <20ms latency. This is equivalent to 4G LTE max, or 5G.
Additional tips
- The mobile camera app is not available for screen capture devices, self-recorded scenarios or CCM stations.
- Sessions must be started and annotated from the SimCapture Cloud domain.
- The mobile camera cannot be paired with a child location.
- We recommend that users turn on “do not disturb” settings so that recording will not be interrupted by a phone call or text.
- Can pair up to 6 Mobile Camera devices in a single environment.
- Up to 4 feed can be recorded at any one time using either mobile cameras or monitor feeds.
- Mobile Camera video streams are recorded at 480p.
- Check your mobile device's battery before starting the recording. If necessary, connect it to a charging cable or a portable battery pack.
- Mobile cameras and IP cameras cannot be mixed and matched in a single session.
- Currently it is not possible to trim recordings with the SimCapture Mobile Camera app.
- The trimming functionality is disabled for the SimCapture Mobile Camera app.
- TruMonitor cannot be used with the SimCapture Mobile Camera app.
Download the app
Install the SimCapture Mobile Camera app from the iOS or Android app stores here:
- Download on iOS App Store
- Download on Google Play for Android
Pairing the mobile device
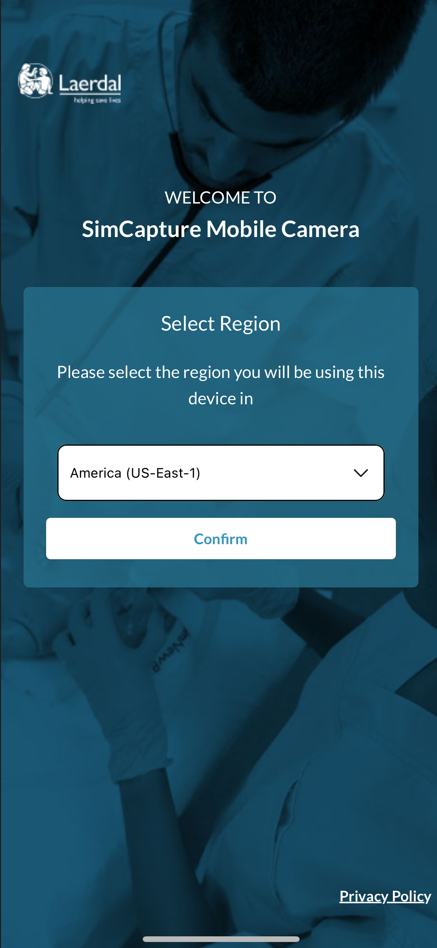
To pair your mobile device, open the app on your mobile device and select your region. In this example, users in the United States would select America.
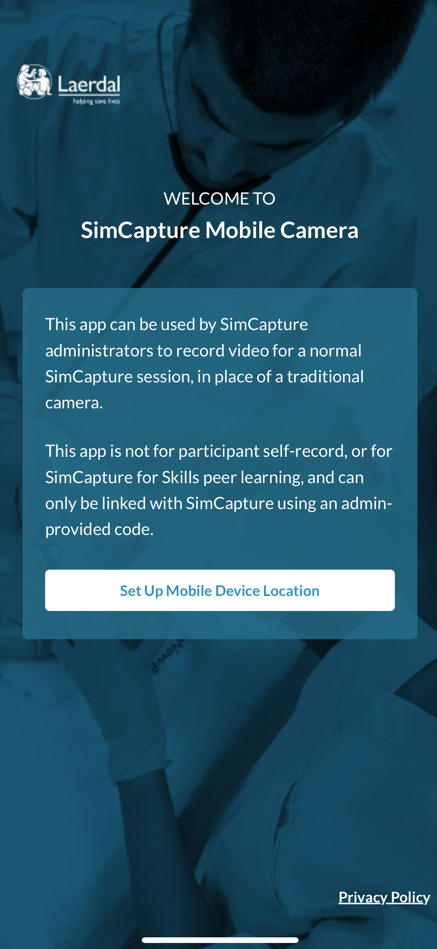
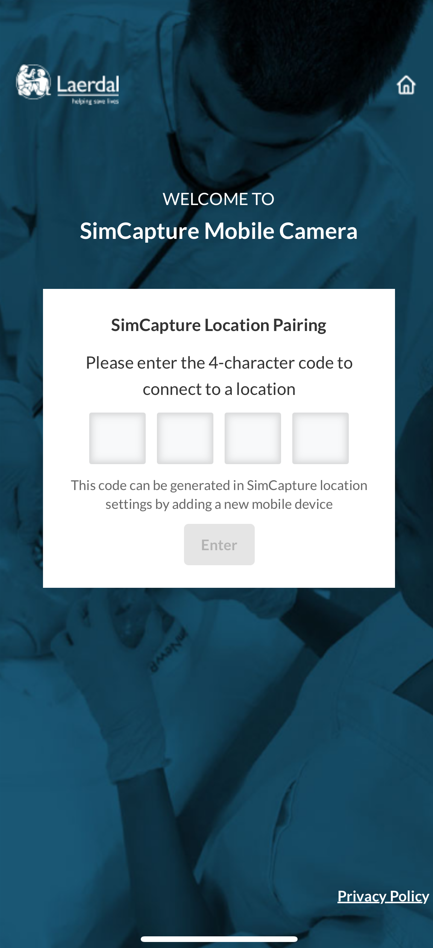
A welcome screen will be shown, and you will click Set Up Mobile Device Location. You will then see a prompt to enter a four-character code.
|
|
Once this is completed, you will log in to your SimCapture Cloud organization and click the gear icon, located in the navigation bar, to access System Settings. Once there, you will see the new option for Mobile Camera.
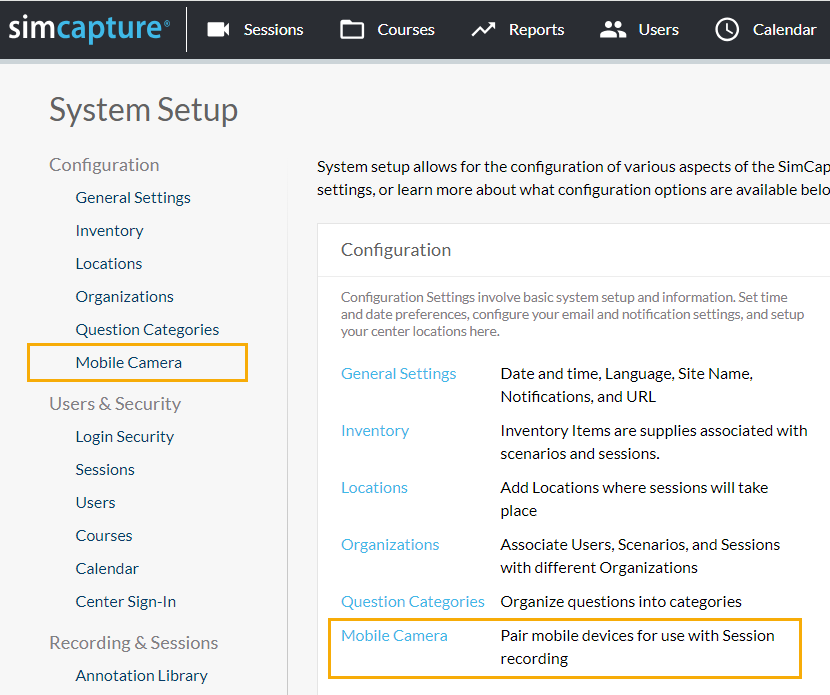
Click Mobile Camera, then click Pair Device.

A four-letter code, that you will need to enter in the mobile app will appear in the Pair Info box. Note: This code will expire in 10 minutes.
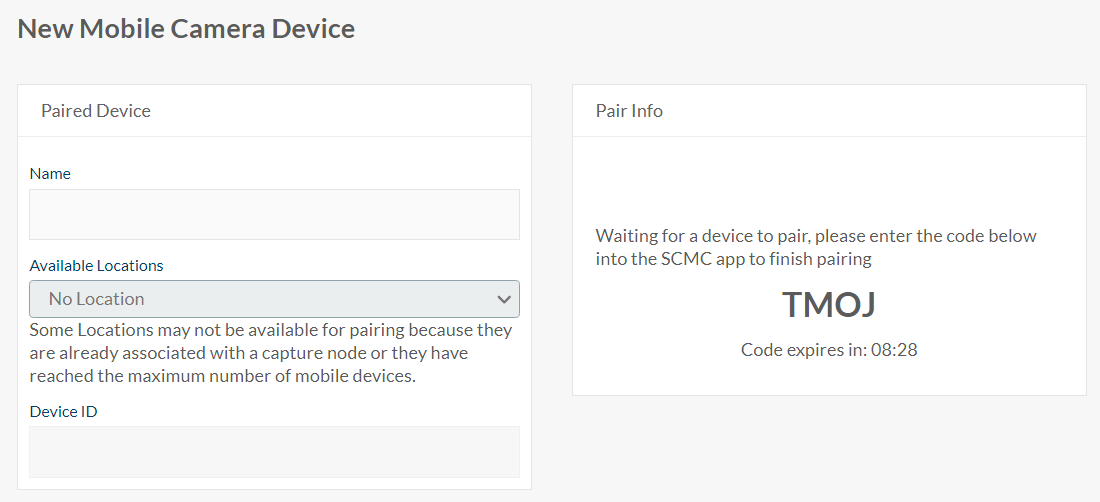
Once the code is entered into the mobile app, write in a name for the device and assign the device to a location.
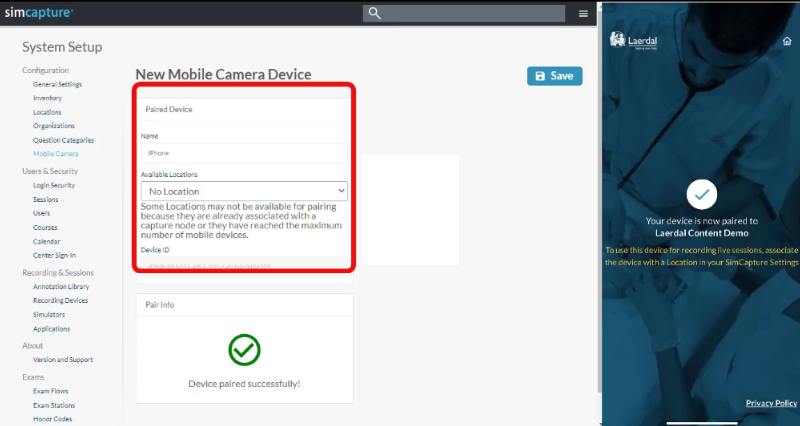
Note: The available location dropdown will show any location that is not already associated with a node, IP recording device, or is not already assigned as an exam room. We recommend that you create one or more locations specifically to use as Mobile Camera locations.
Once the app has been paired and assigned to a location, it will display a confirmation of the location connected and a message of waiting for a session to begin. A mobile camera icon will display on the location as well.
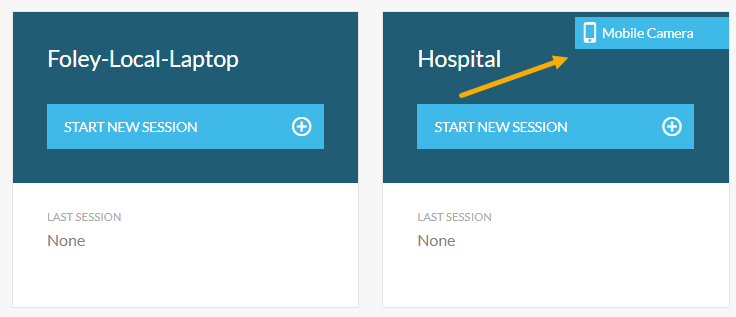
You can assign up to four mobile camera devices to the same location. Additionally, the location assigned to a mobile camera device can be added or changed later by selecting a device from the list on of devices on the mobile camera settings page.
Note: If the app has been paired with a client, but has not been assigned a location, you will be prompted to assign a location before the app can be used.
Pair Patient Monitor Capture
Please see our Patient Monitor Capture article for more details.
Recording with the SimCapture mobile camera
Now that you know how to pair and unpair your device, let’s look at how to start and end a mobile camera session.
Things to know before you begin recording
- It is important to make sure that your mobile device is fully charged and that you have a strong internet connection before you begin.
- Mobile camera locations can be used to create reservations in the calendar and these reservations will show up in the Sessions list when starting a session from a dashboard tile.
- An Ad-hoc Session can be started if there are no reservations for the session.
- Make sure your device is positioned horizontally to ensure a clear view of participants.
- When using the app for the first time, you may have to give SimCaptureMobileRecord access to the device camera, microphone, and Bluetooth.
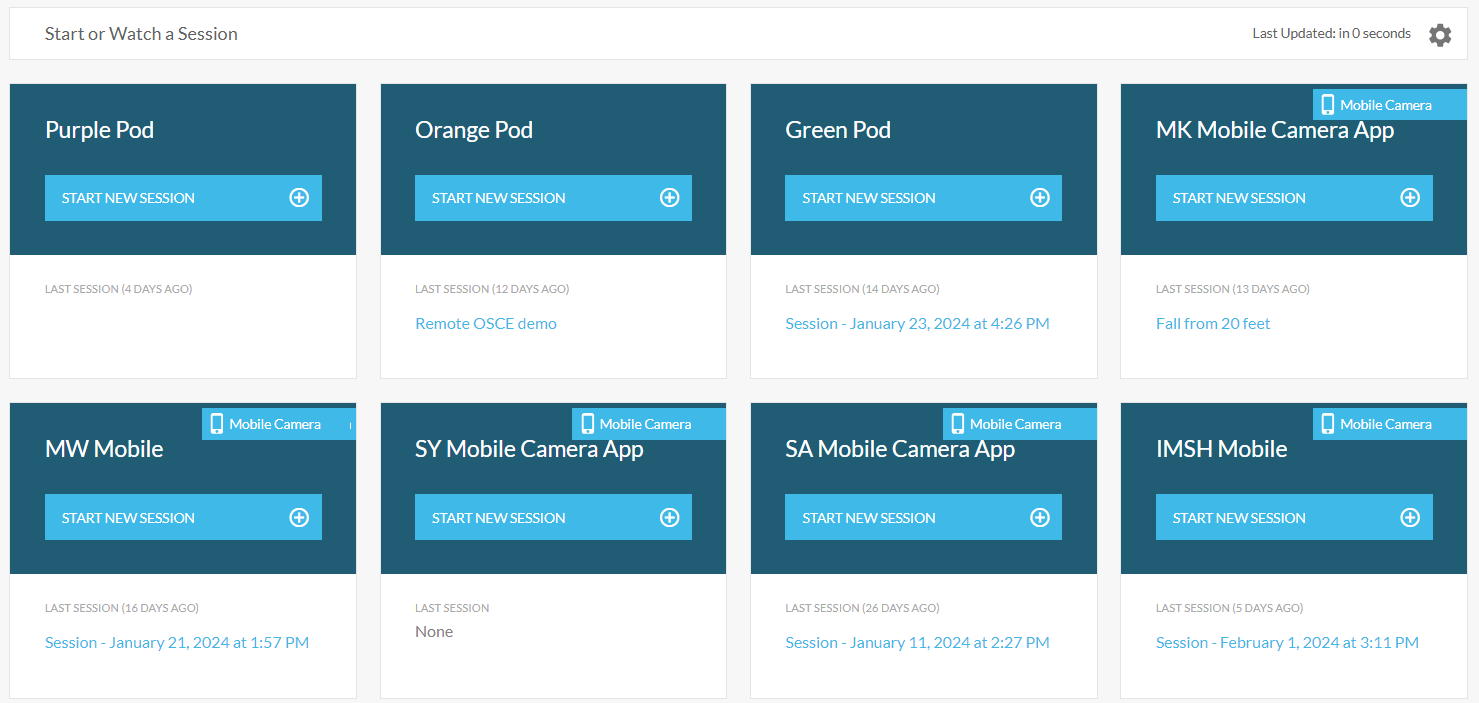
Once a location has a SimCapture mobile camera device assigned, that location will display in the list of tiles on the SimCapture Cloud homepage.
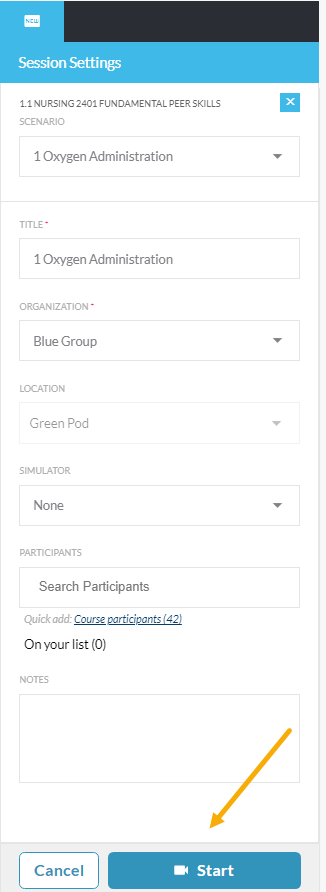
From the home page, you will click Start New Session, the Start Session screen will open and the mobile camera devices in that location will automatically connect if the app is open on the mobile device.
Be aware that the recording will be taken horizontally.
Before starting the session, be sure that your session details are filled in and then click Start to begin the session.
Using LLEAP with the SimCapture mobile camera
If your SimCapture Cloud environment is configured with the LLEAP plug-in and you use SimCapture as your LLEAP debrief option, you can also start SimCapture Mobile Camera sessions in LLEAP
Things to know before you begin using LLEAP
When starting a session in LLEAP:
- You must de-select any devices linked to the Room/Location that you are not using in that session.
- You should not also attempt to start a session in the same location from the SimCapture Cloud platform as this will cause errors.
- LLEAP events will go to SimCapture Cloud in the same way as any other SimCapture Cloud + LLEAP session and will show in reporting.
To do this, select your Mobile Camera location from the list of SimCapture Rooms when starting a session recording in LLEAP. From there, you will see the list of any Mobile Camera or PMC devices paired with the Location in the Cameras section in LLEAP.
End a session
To end a mobile recording session, simply click End Session and then click Confirm to stop video streaming and recording from the mobile recording devices and return them to their default waiting state.
Unpair the mobile device
To unpair the mobile camera device, go to the System Settings area of your SimCapture Cloud organization and take these steps.

- Click Mobile Camera.
- Click the name of the camera you want to unpair.
- Click Unpair.
Once this is done, the app will revert to the default state and will need to be re-paired to be used.