Creating and copying a SimCapture On-Premise Pro Scenario

Written by Jeri Ellis
Updated at May 17th, 2023
Table of Contents
- SimCapture Cloud Release Notes
- SimCapture Cloud Administrator and Faculty Help
- SimCapture Cloud Learner Help
- SimCapture On-Premise Help
- SimCapture for Skills Help
- SimCapture Mobile Camera App
- SimCapture Companion Apps Help
- SimCapture Integrations Help
- Samaritan AI Help
- SimCapture Cloud Use Cases
- Hardware and Network Technical Information Help
- Glossary
This article will discuss the basics of creating a new Scenario. Scenarios are used to organize and tag sessions and allow for more targeted annotations and learner self-reflection, which can enhance your debriefing and learning outcomes.
Creating a Scenario
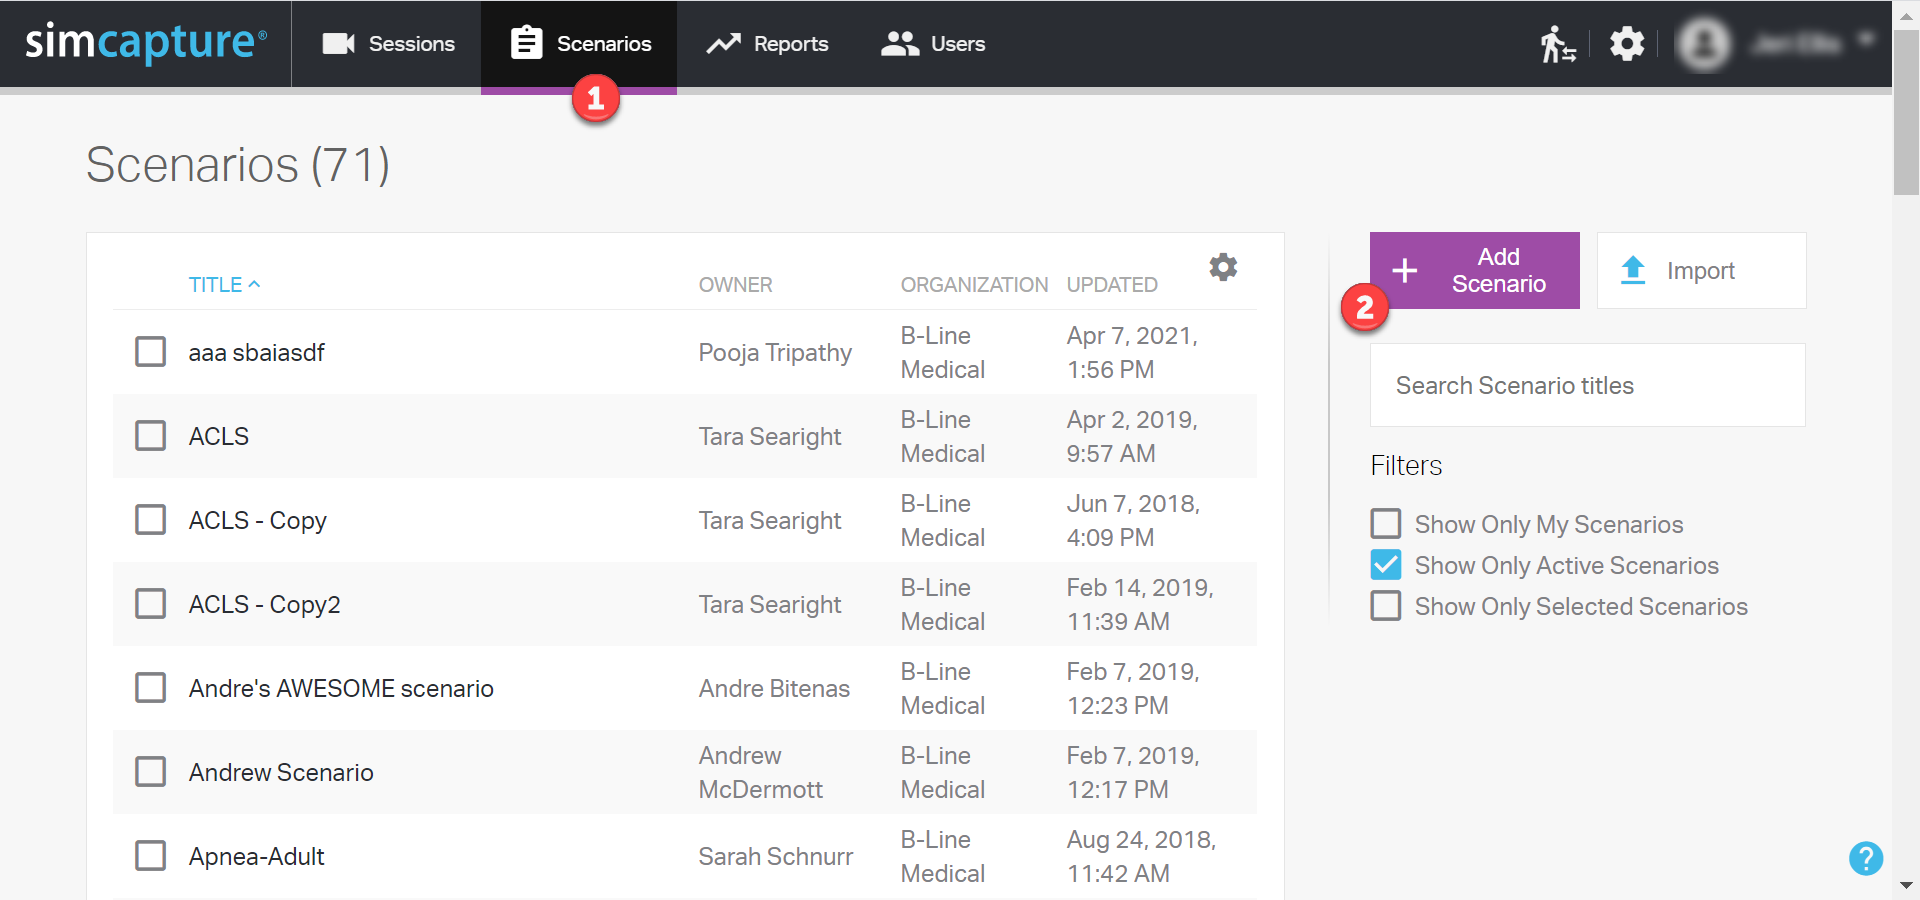
- Access the Scenario List by clicking the Scenarios button on the global navigation bar.
- Click Add Scenario.
- If you do not see the option to Add a Scenario, contact your system administrator and make sure you have the Create Scenarios permission (see here).
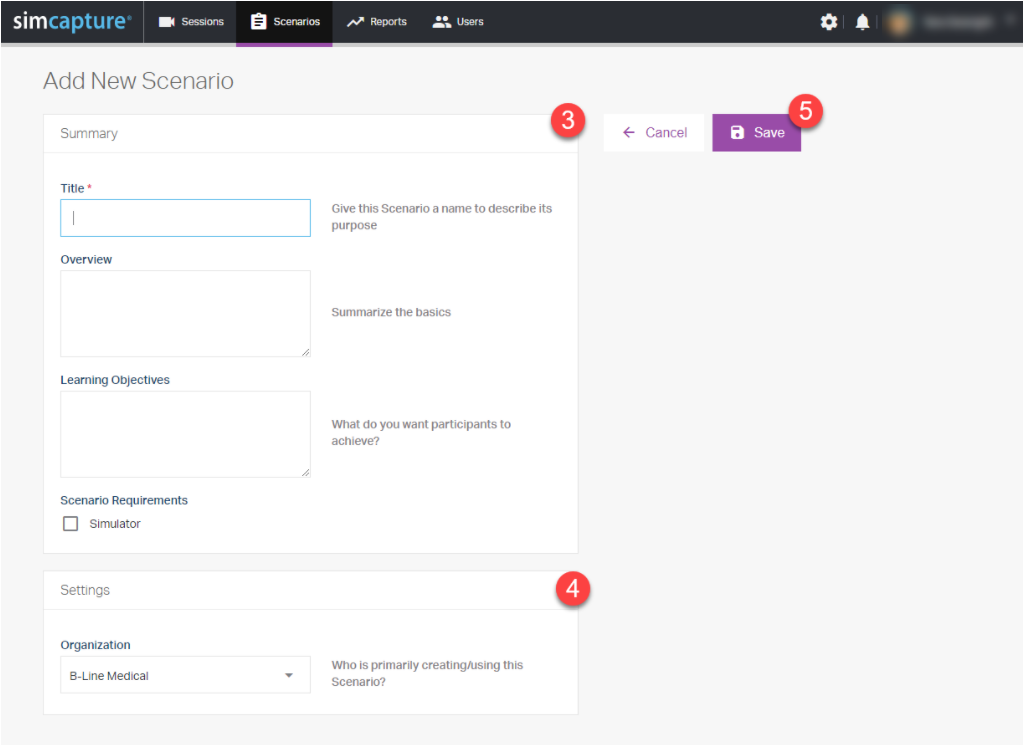
3. On the Add Scenario Page, enter your Scenario Details.
- Title: This is the title of your Scenario. It will be displayed in the Scenario list and is the default title for all sessions started with this Scenario.
- Overview: The overview is great for summarizing the main points of the Scenario to help others understand the purpose and flow of the Scenario.
- Learning Objectives: The Scenario's learning objectives can be listed here so they can be easily referenced.
- Scenario Requirements: Does this Scenario require the use of a Simulator? If so, check this box and select the simulator you'd like to use.
4. Configure Scenario Settings
- Organization: The scenario organization is used to tag the Scenario with the group it relates to and easily share the Scenario with administrators within its organization if you choose.
5. Save
- Saving your Scenario will navigate you directly to the Scenario details page to further configure your Scenario.
Adding Annotations, Settings, and Attachments to a Scenario
The Scenario will have the following four fields that can be edited:
- Summary - the Summary contains the data entered when creating the scenario for the first time. Note that the Title field is required. To access the Summary field, click the pencil icon. From there, add your information and click Save.
- Annotations - pre-defined annotations from the Annotation Library are available to be added to the scenario. These Annotations will then be available for use during a session and can be reported on for a number of times selected. The Annotations field is accessed by clicking the pencil icon. Select the “+” sign next to the predefined annotation to add to the Scenario Annotation field or select and hold “=” and drag to the Scenario Annotation field and release. To arrange the annotations in a specific order, click and hold the "=" and move as desired. Remember to click Save when done.
- Settings - administrators may provide a Public title seen by participants in their portfolio. A simulator may also be selected for tracking purposes. Access the Settings field by clicking the pencil icon. In this field, you can add a Public Title, that learners and external users will see, and set your Video Deletion Policy. Click Save.
- Attachments - scenario planning worksheets, scripts, equipment lists, etc. may be included for Course Contributors to access. Attachments can be added by clicking either the pencil icon in the Attachment field or by clicking the Add Attachments link. You can drag and drop files or click Choose File to upload the file. Click Save.
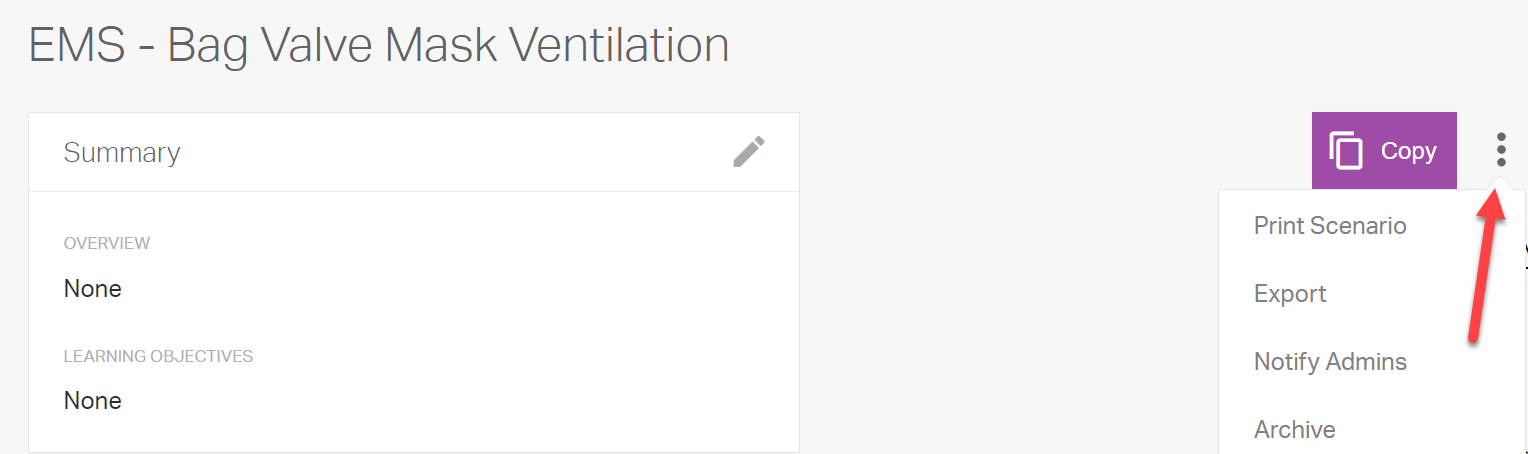
Copying a Scenario
As a user, you have the ability to copy a Scenario with just the click of a button. To do this, click the name of your Scenario and then click Copy. Additionally, when you click the Kanab icon (3 vertical dots), you can Print Scenario, Export, Notify Admins, or Archive the Scenario.