SimCapture On-Premise: Getting started with center sign-in
Learn how to easily get started with center sign-in using SimCapture On-Premise, allowing you to efficiently manage your simulation center's user access and tracking.

Written by Jeri Ellis
Updated at February 29th, 2024
- SimCapture Cloud Release Notes
- SimCapture Cloud Administrator and Faculty Help
- SimCapture Cloud Learner Help
- SimCapture On-Premise Help
- SimCapture for Skills Help
- SimCapture Mobile Camera App
- SimCapture Companion Apps Help
- SimCapture Integrations Help
- Samaritan AI Help
- SimCapture Cloud Use Cases
- Hardware and Network Technical Information Help
- Glossary
This new kiosk interface enables a more efficient way to capture participant entry and exit of the Simulation Center using their SimCapture or LDAP credentials and may help track learner contact hours for use with SSH accreditation.
Major features
- Easily view sign-in and sign-out records for your center
- Filter on users currently signed into the center when starting a session
- Track upcoming scheduled events and see who is currently in the center.
- New reports provide data for learner contact hours by organization and user and attendance reports for late arrivals or no-shows.
- Clean, modern interface for use with desktop or tablet sign-in kiosk stations
What do I need to use center sign-in?
The Center Sign-In interface can be loaded on any PC or tablet device if it has an internet connection and can access the SimCapture centralization server. Center Sign-In must also be enabled by a member of our support team, which can be done quickly and at no cost with an active support contract.
Administering center sign-in
The screen is located in the Admin section of the software and contains all of the administrative features of the Center Sign-in process.
- Users: Provides a center-level view of all users currently or recently signed-in\out.
- Schedule: Displays all the current events for the day including the number of participants scheduled for the event and the number of scheduled participants currently in the center.
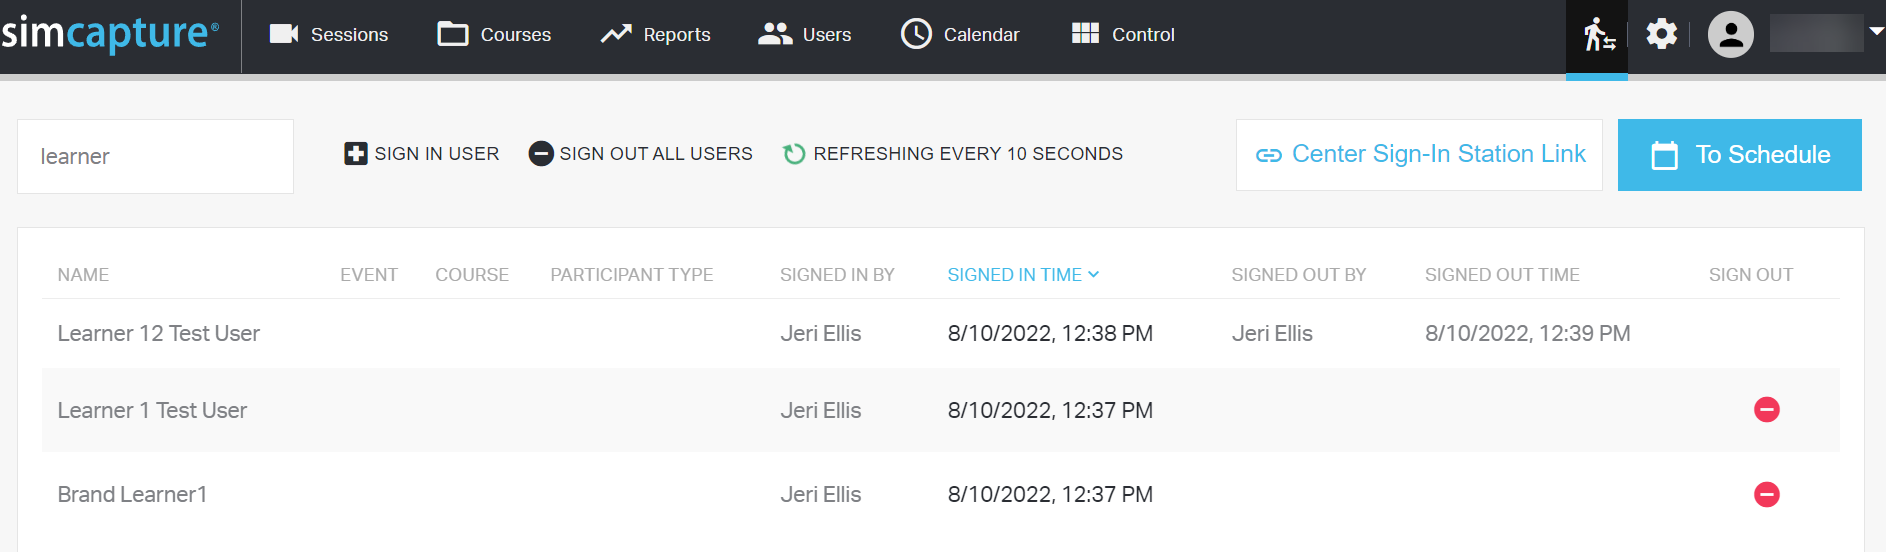
For each user, the table will show the following information:
- Name
- Event: Displays the active event for that user
- Course (if applicable): Displays the Course associated with the event
- Participant Type: Displays the participant type associated with the user for that event
-
Signed In By: Displays who signed in the user. The option for this column is:
- User - The user signed themselves in
- Admin - An admin remotely signed them in
- Signed In Time
-
Signed Out By: Displays who signed out the user. The options for this column are:
- User: The user signed themselves out
- Admin: An Admin signed this user out from the Admin page
- System: The user was automatically signed out after timing out of the center (automatic timeout time can be changed by our support team)
- Sign Out User: Only appears for users currently signed in and immediately signs out the user when clicked.
At the top of the screen are the following options for administrative actions:

- Sign In User - Will bring up a pop-up where an administrator can search for a user to sign in. Users signed in this way will show up as signed in by "Admin"
- Sign Out All Users - Will bring up a dialog and if confirmed all currently signed-in users will be signed out by "Admin". This feature is catered towards the end of a day or event to make sure that everyone has been signed out
- Refreshing Every 10 Seconds – Will refresh the page and display the most current information
- Center Sign-In Station Link - Will provide a link that is used to paste into the browser of the kiosk station’s browser. When loaded, the link will bring up the Center Sign-In interface on the kiosk computer. This works the same way as "Copy Session Link" does within the session viewer.
- To Schedule – Will navigate you to the Center Sign-In Events Page (See Schedule Admin Page)
Schedule administration page

For each scheduled event, the table will show the following information:
- Start Time – Date and Time the event is scheduled to begin
- End Time – Date and Time the event is scheduled to end
- Course (if applicable): Displays the Course associated with the event
- Title: Displays the Event Title including Section Title (if applicable)
- Locations: Displays the locations assigned in the event
-
In-Center/Enrolled:
- In-Center: The number of event participants signed in to the center
- Enrolled: The total number of participants in the event.
Event details
Selecting the Event will provide a pop-up that includes more information about the event participants:

For each event, the table will show the following information:
- Name – Participant Name and their Participant type for the event
- Signed In Time
-
Signed In By: Displays who signed in the user. The option for this column are:
- User - The user signed themselves in
- Admin - An admin remotely signed them in
- Start: If an event is about to begin this button will appear and will direct them to the Start\Join Session screen
Using the center sign-in interface
Signing into and out of the center is done through an HTML web interface and can therefore be used on any device that has access to the SimCapture network. To access the Center Sign-In interface, enter the Center Sign-In Station Link (referenced above) into your preferred browser on the Sign-In device.
The Center Sign-In interface has three major parts, the administrator verification login page, the Center Sign-In login/logout page, and the Confirmation Page.
Administrator verification page
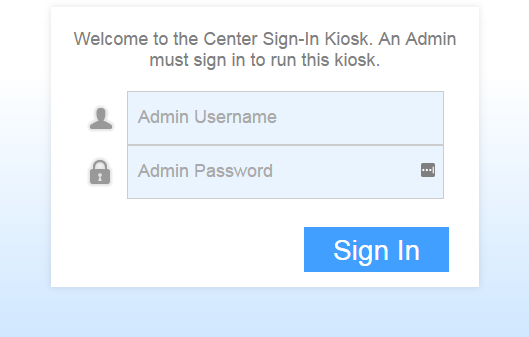
Before users can utilize the interface for signing into and out of the center, the station must first be verified by a SimCapture administrator. This prevents other users from using the link to create their own unauthorized Sign-in stations. Once verified, the Sign-In station will remain enabled until the device is powered off or the SimCapture system restarts.
Sign-in/out interface
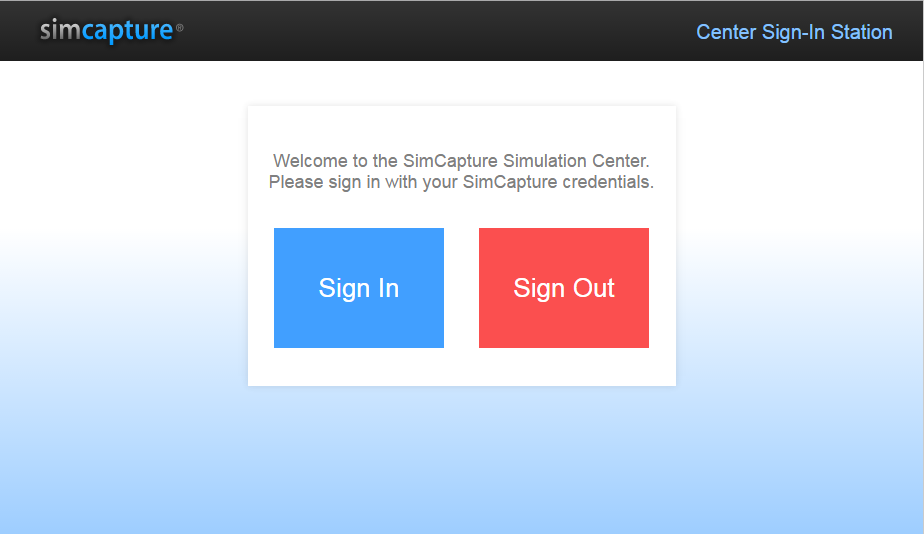
Once the admin has authenticated the station, there will be a welcome message as well as buttons for users to sign in and sign out of the center. To sign in, users will need their username and password. To sign out, they will only need their username.
Note: LDAP account creation will function with this feature, so if your institution has LDAP enabled with account creation functionality you can also use the center sign-in kiosk to create accounts for users.
From this point, you can now log in using Single Sign-On (SSO) or by clicking the Login button and using your credentials.
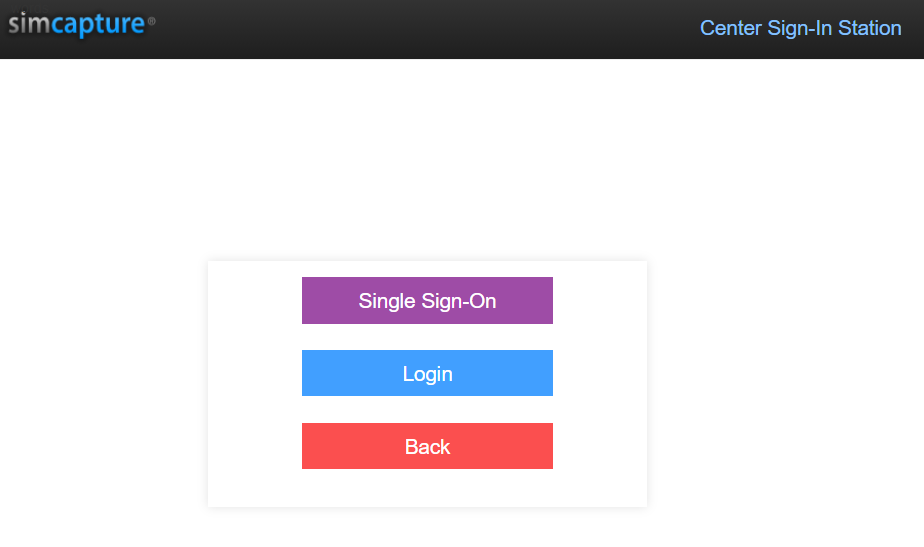
Note: SimCapture will still prompt an administrator Login when opening the kiosk for the first time.
Confirmation page
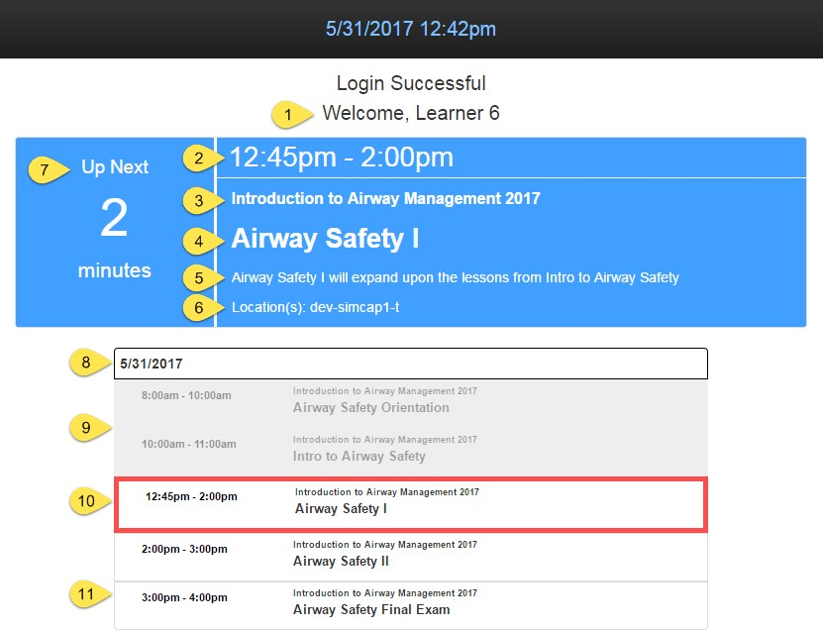
- Participant Name
- Start and End Time of the Active Event - Active event can be an event that has started already or that is starting shortly
- Course Name
- Event Title
- Event Notes
- Locations assigned to the Event
- Help Banner
- Up Next - Displays how many minutes until the event starts if it is starting soon (Customizable with help of Laerdal Support Team)
- In-Progress – If the event has already begun then display this for a set amount of time (Customizable with help of Laerdal Support Team)
- Itinerary – Displays all the events the participant is associated with for the current day
- Past Events – Events that have already ended
- Active Event - Event that has started already or that is starting shortly
- Future Event – Event that has yet to begin
Using center sign-in information
Sign-in information can be used not only for tracking participants as they arrive and depart the center but also to introduce new functionality for starting sessions and reporting.
Starting Sessions
When starting a new session, Operators have a new option to “Show Current In-Center Users” which will filter the list of available participants to only those that are currently signed into the center. This new feature should streamline the process of adding users to sessions within SimCapture.
Additionally, this checkbox also appears in the “Edit Participants” area from the Session Viewer, so participants can be easily added once a session has been started as well.
Reporting
The Center Sign-In feature also comes with a new report to track the time of users signed into the center as well as new attendance reports.
Usage by center sign-in report
This new report can be accessed through Usage Reports, under the “Usage by Center Sign-In” option which is accessed by going to Reports > Usage > Center Sign-In. Valid filters for this new report are organizations and dates, and data can be categorized by Overall Time, by User, or by Organization.
Attendance reports
These new reports can be accessed through Usage Reports, under the Attendance option. Valid filters for this new report are and the options are Summary – All Events, No-Show by Event, Late by Event, and Summary by Event.
Summary – all events
The report displays the total number of on-time, late, and no-shows for a group of events
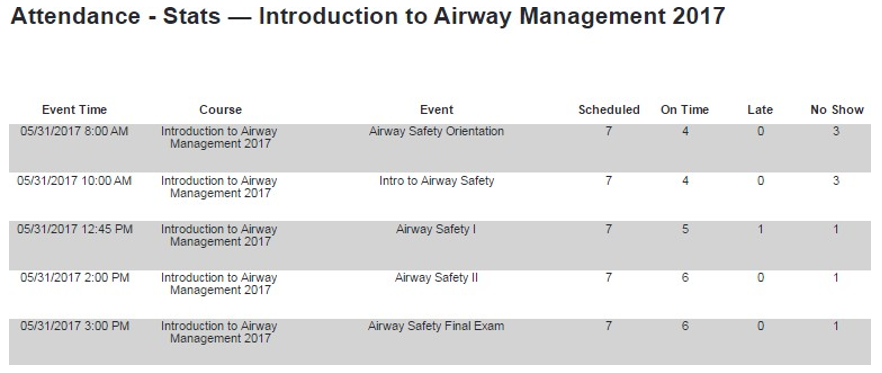
Summary by event
Report displays by an event in which participants were on-time, late, or did not show.
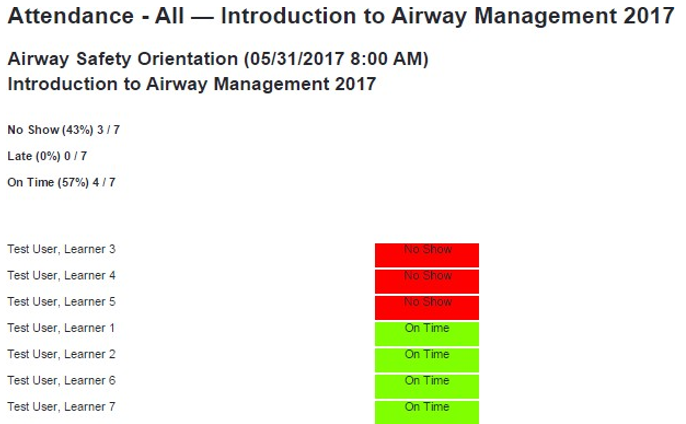
No-show by event
Report displays by event in which participants who were associated with an event but did not sign in to the center.
Late by event
Report displays by event which participants who were associated with an event, but who signed in after the event was scheduled to begin.