SimCapture for Skills: 셀프레코딩 시나리오 예약 및 평가
SimCapture 을 사용하여 학생이 직접 녹화한 세션을 할당하고 평가하여 교실에서 기술 평가를 위한 새로운 기능을 활용하세요.

Written by Jeri Ellis
Updated at August 29th, 2025
Table of Contents
이 문서에서는 시스템 관리자가 셀프레코딩 세션을 할당하고 평가하는 방법을 보여줍니다.
시작하기 전에 알아야 할 사항
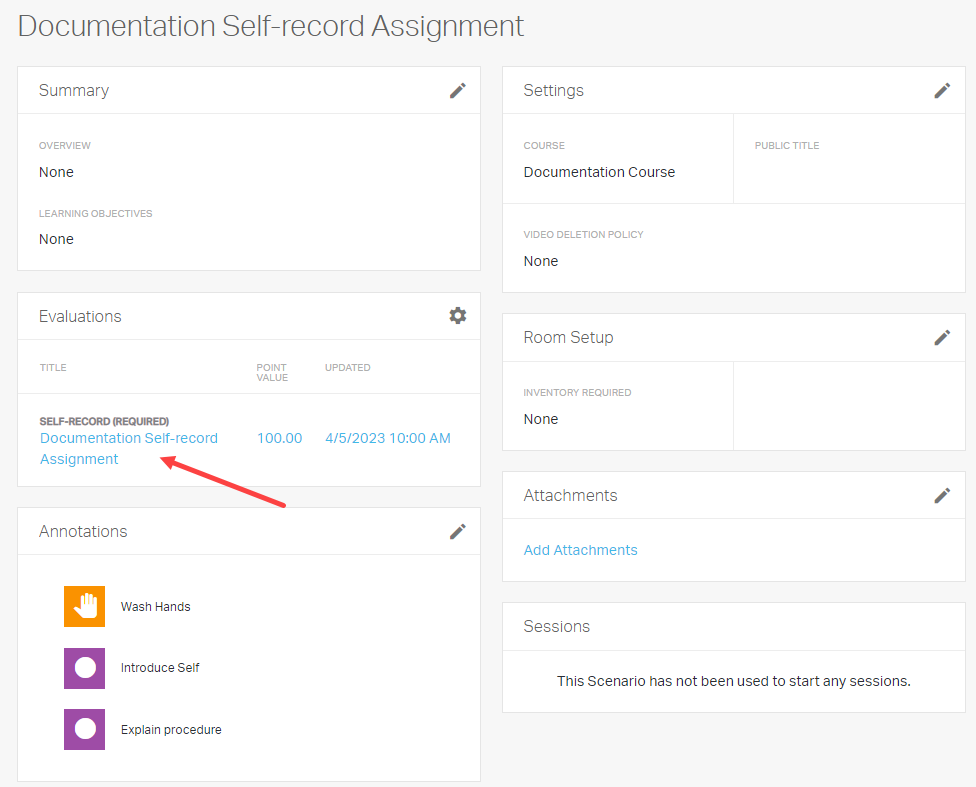
학생의 셀프레코딩 세션을 할당하고, 평가하려면 먼저 셀프레코딩 시나리오가 있어야 합니다. 평가 작성에 대한 자세한 내용을 보려면 여기를 클릭하십시오.
셀프레코딩 평가 할당
셀프레코딩 평가는 세 가지 방법으로 할당될 수 있습니다.
- 자체 평가
- 동료 평가
- 교수 평가
사용할 평가 방법을 선택하려면 다음 단계를 수행하여 시나리오의 평가 수준으로 이동합니다.
- 코스 클릭
-
셀프레코딩 시나리오 클릭
시나리오를 만드는 방법에 대한 정보가 필요한 경우 여기를 클릭하고 페이지의 커리큘럼 시나리오 섹션으로 이동하세요. -
평가지탭 아래, 셀프기록(필수) 평가지 클릭
-
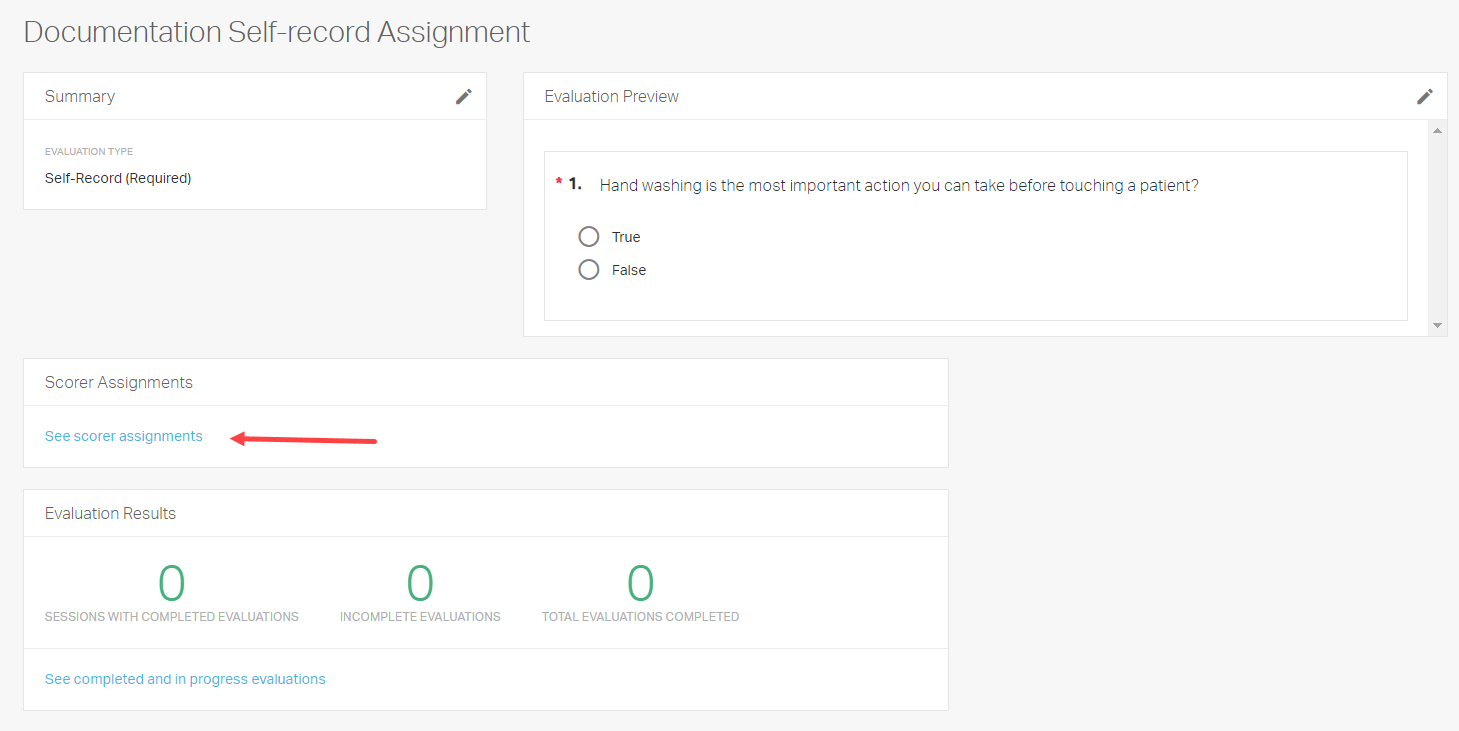
득점자 과제 보기를 클릭
-
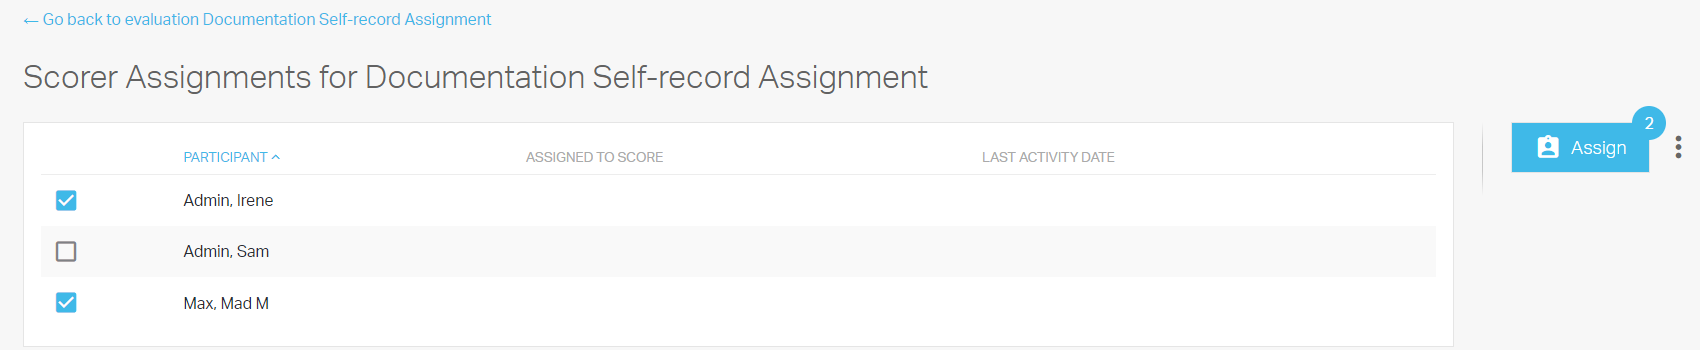
개별학생 또는 전체학생 체크 후 할당 클릭
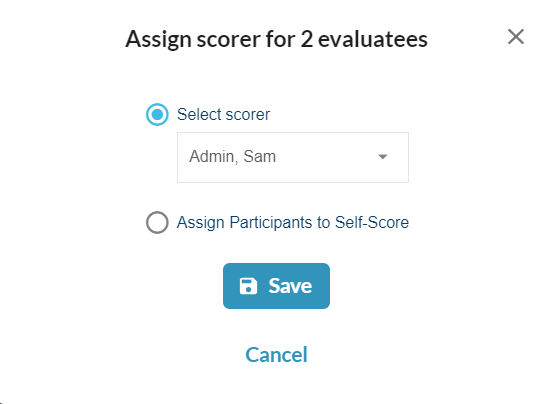
- 자기 점수에 참가자 할당을 선택하거나 점수를 매길 개인(동료 또는 참가자)을 드롭다운 목록에서 선택합니다. 저장 을 클릭합니다.
셀프레코딩 일정 예약
채점자를 지정한 후 자체 기록 이벤트 일정을 계획할 수 있습니다. 이것이 어떻게 수행되는지 살펴 보겠습니다.
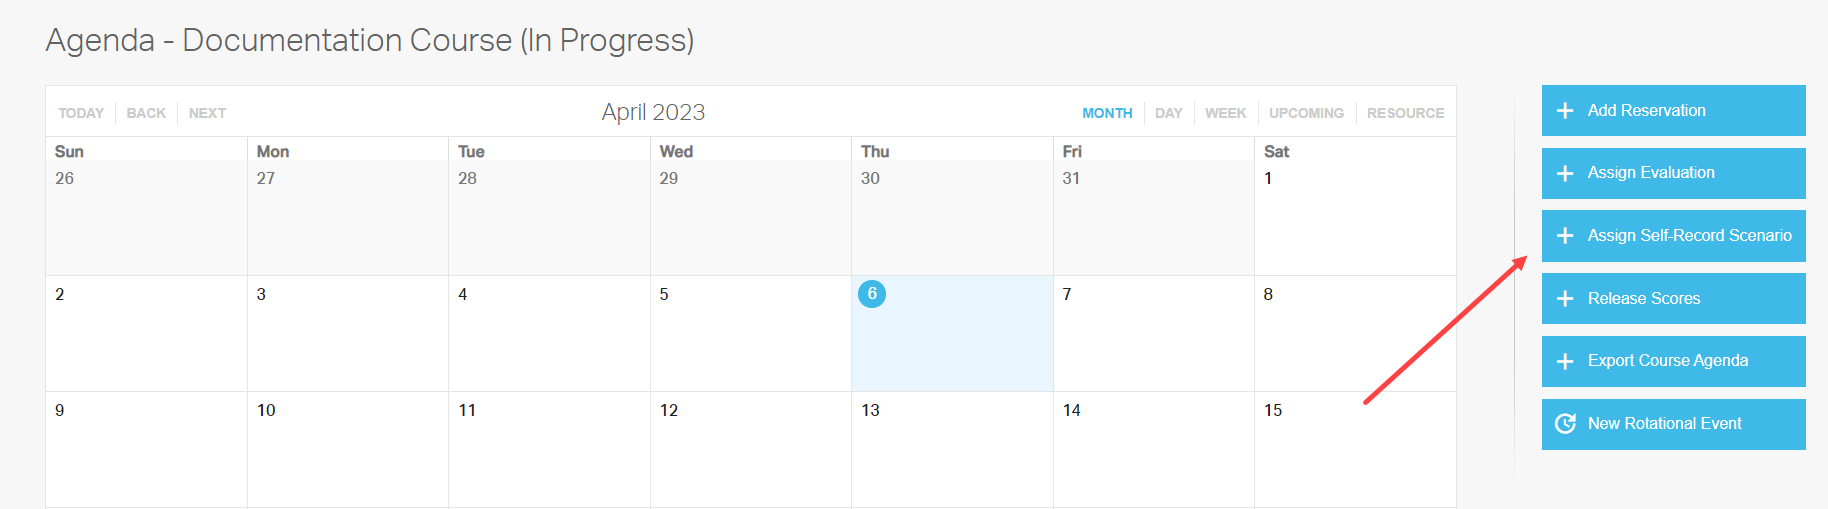
- 코스 페이지의 중간에 있는 일정으로 이동하여, 전체 일정으로 이동을 클릭합니다.
- 셀프레코딩 예약을 클릭한 다음 할당할 필수 시나리오를 입력하고 공개(시작) 시간과 날짜를 선택한 다음 모든 코스 참가자에게 할당하거나 일부 사용자에게만 할당합니다. 취소 시간과 날짜는 선택사항입니다.
- 저장을 클릭합니다.
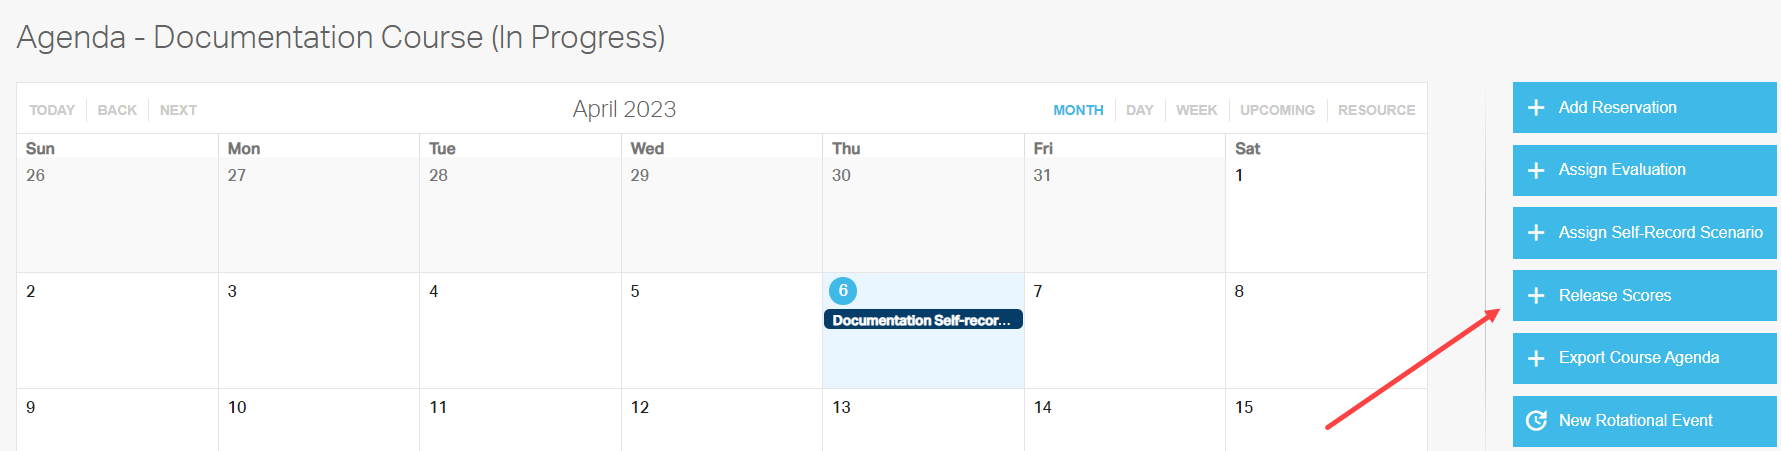
- 캘린더 페이지로 돌아가서 점수 공개를 클릭하세요. 옵션을 선택하고 저장 을 클릭합니다.
이 시점에서 코스가 시작되고 학생들은 셀프레코딩을 제출할 수 있습니다. 셀프레코딩 세션에 강사 평가를 추가하는 방법에 대한 정보를 보려면 아래를 계속 읽으십시오.
셀프레코딩 세션에 평가자 할당
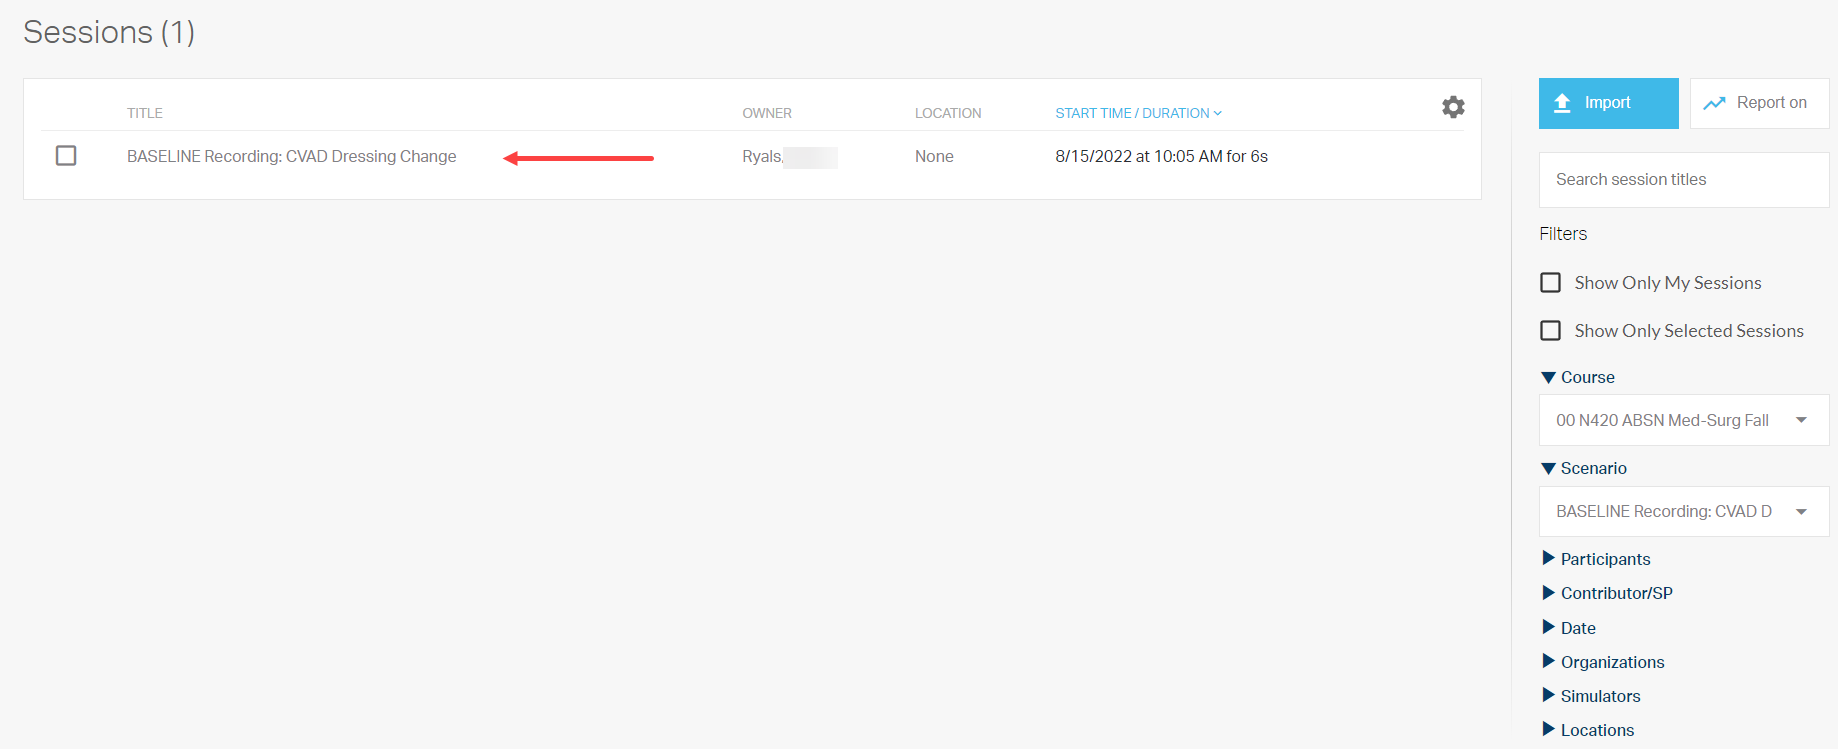
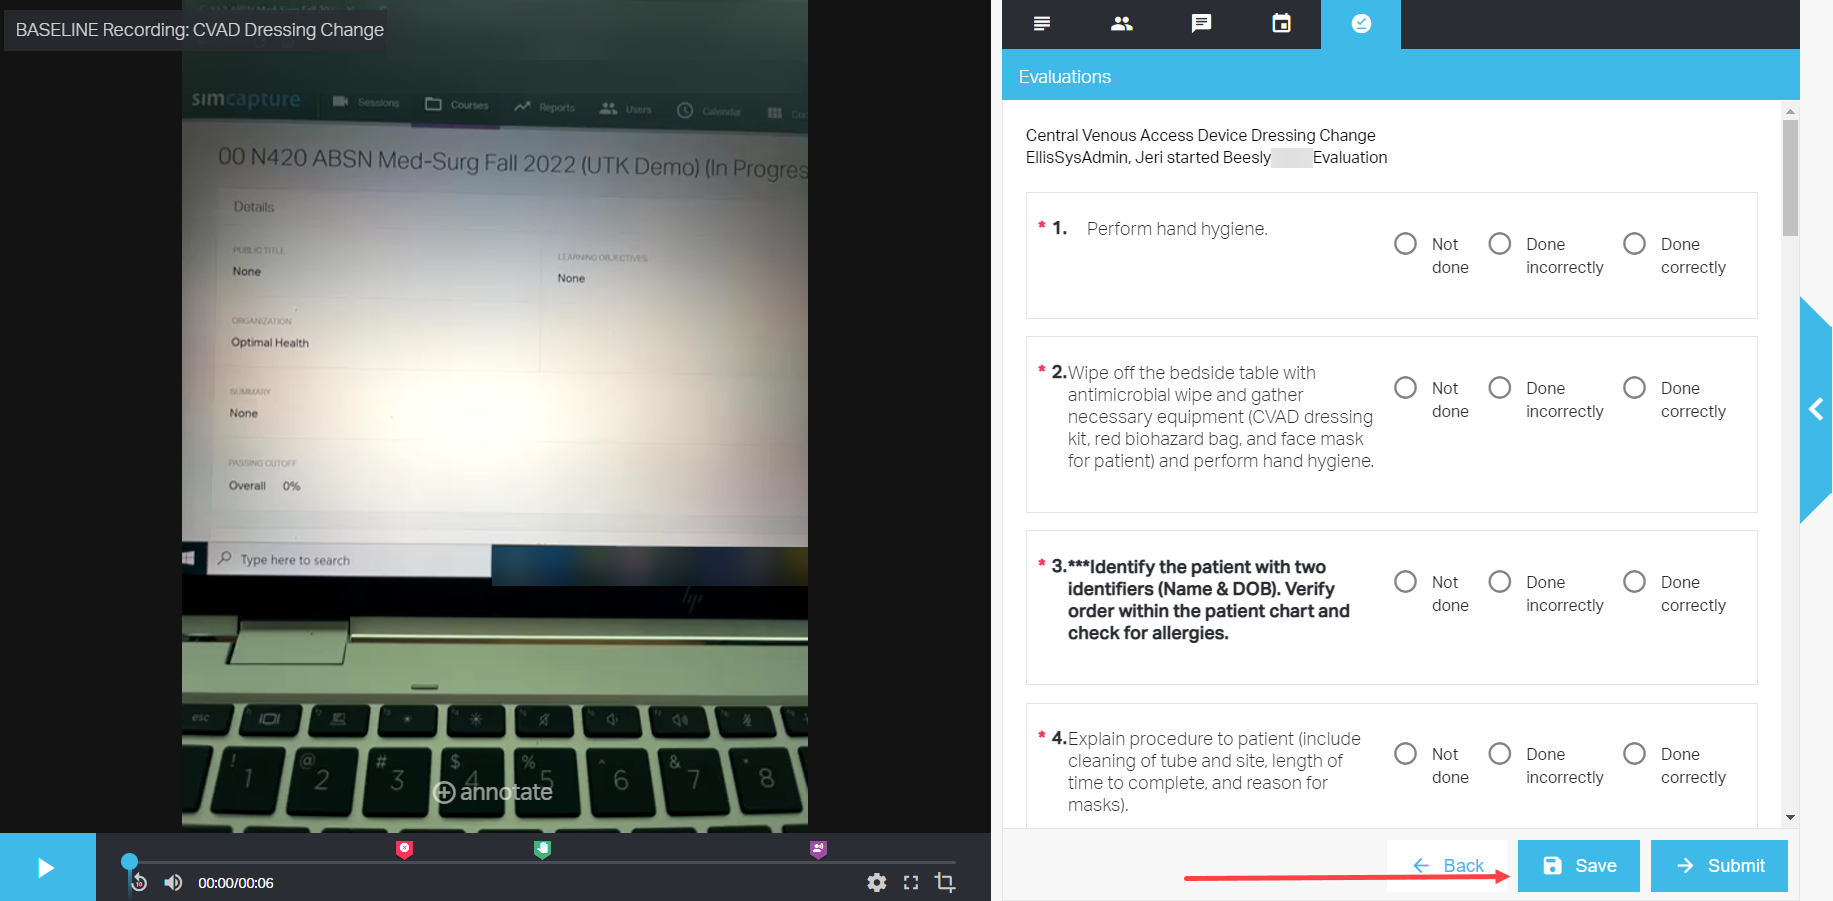
- 세션 탭을 클릭하고 귀하가 참여하고 평가하려는 코스에서 자체 기록 세션을 선택합니다.
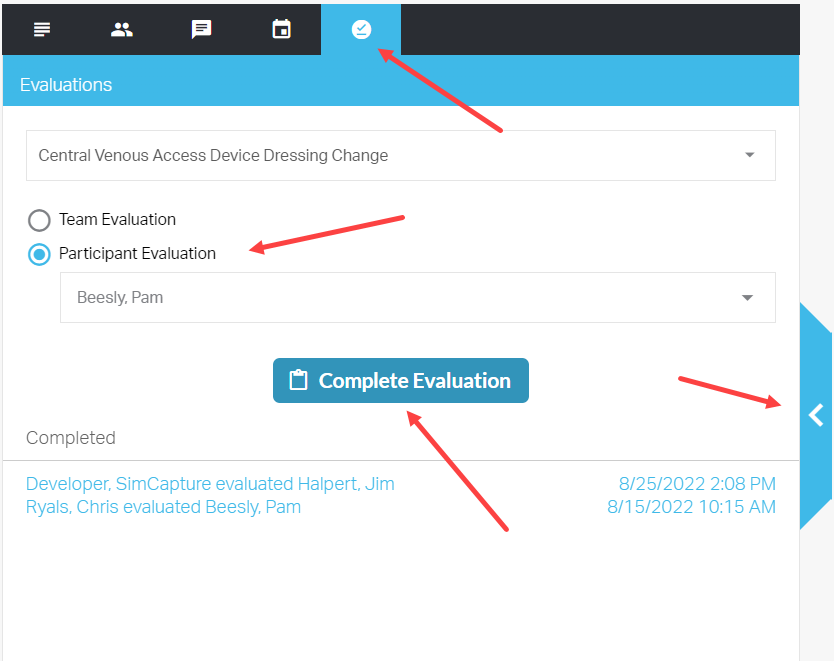
- 오른쪽의 파란색 사이드바를 클릭하고 확인 표시 아이콘을 클릭하여 평가 탭에 액세스합니다.
- 참가자 평가를 선택하고 드롭다운 메뉴에서 학생 이름을 선택한 후 평가 완료를 클릭합니다.
-
체크리스트를 살펴보세요. 저장을 클릭하여 장소를 저장하고 동영상을 펼쳐 검토를 계속하세요.
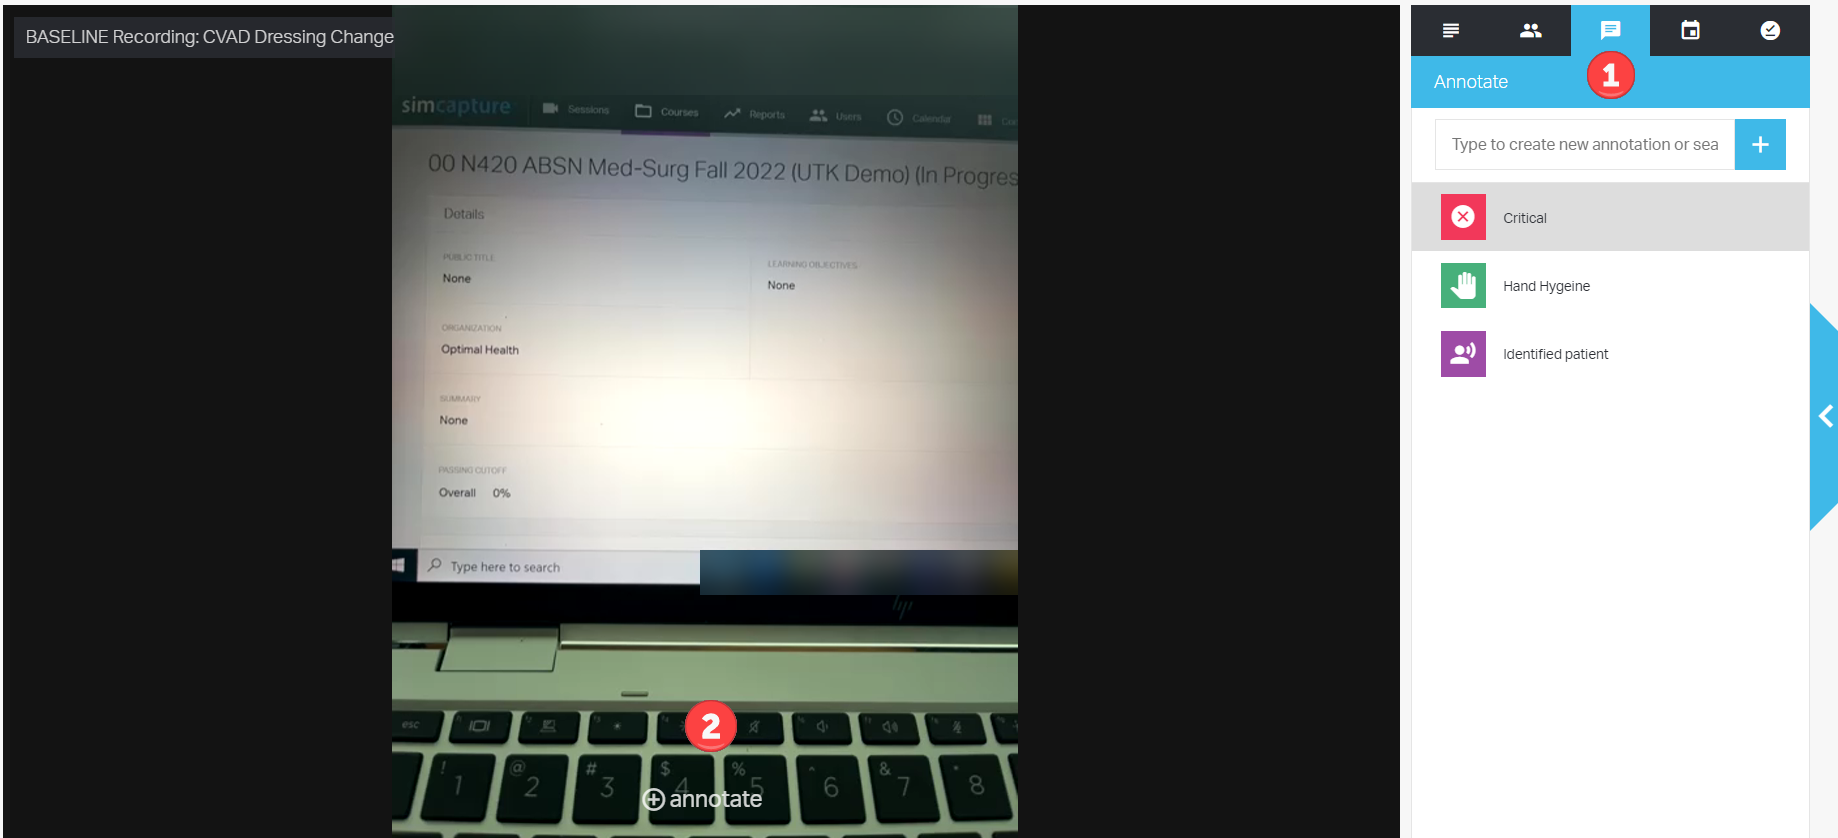
주석 추가
평가에 주석을 추가하는 방법에는 두 가지가 있습니다.
- 세션 뷰어 내에서 텍스트 아이콘을 클릭하여 사전 정의된 주석을 선택하세요. 이러한 주석은 시스템 설정 영역에서 가져와 과정 시나리오에 추가됩니다.
- 세션 뷰어 내와 페이지 하단 근처에서 주석을 클릭하여 타임라인에 임시 주석을 추가합니다. 학생들은 강사 피드백을 반영하면서 이러한 내용을 검토할 수 있습니다.
완료되면 저장 및 제출을 클릭하는 것을 잊지 마세요.
참고: 점수를 공개할 때 선택한 항목에 따라 학생은 자신의 프로필에서 평가, 기록 및 주석을 즉시 검토할 수 있습니다.